
Pickling your Backyard Harvest
The unpredictability of the what’s on the grocery store shelves and the desire to be more self-sufficient in the midst of the COVID-19 pandemic has lead to some interesting buying patterns in the past few months. First, it was toilet paper, then yeast and hair dye, and finally, seeds.
Seed packet sales have seen a significant uptick since March. Whether starting a garden is a nice excuse to get outside or the best way to ensure a steady supply of healthy food for your family, the number of seed packets sold this spring means that many more people will be trying their hand at gardening this year.
The hope is that your garden is well in the swing of things by now and you may even be seeing the beginning of your tomatoes, cucumbers or peppers peaking from the vines and stems. As any avid home gardener can tell you, your first harvest is so exciting! Being able to head to your back yard and pick dinner is a rewarding experience. However, the excitement wanes a bit if you’ve had a particularly fruitful plant or two and you’re on you’re 12th day of zoodles. Chances are by August may be trying to make new friends just so you can give them a bushel of peppers or a bag of tomatoes.
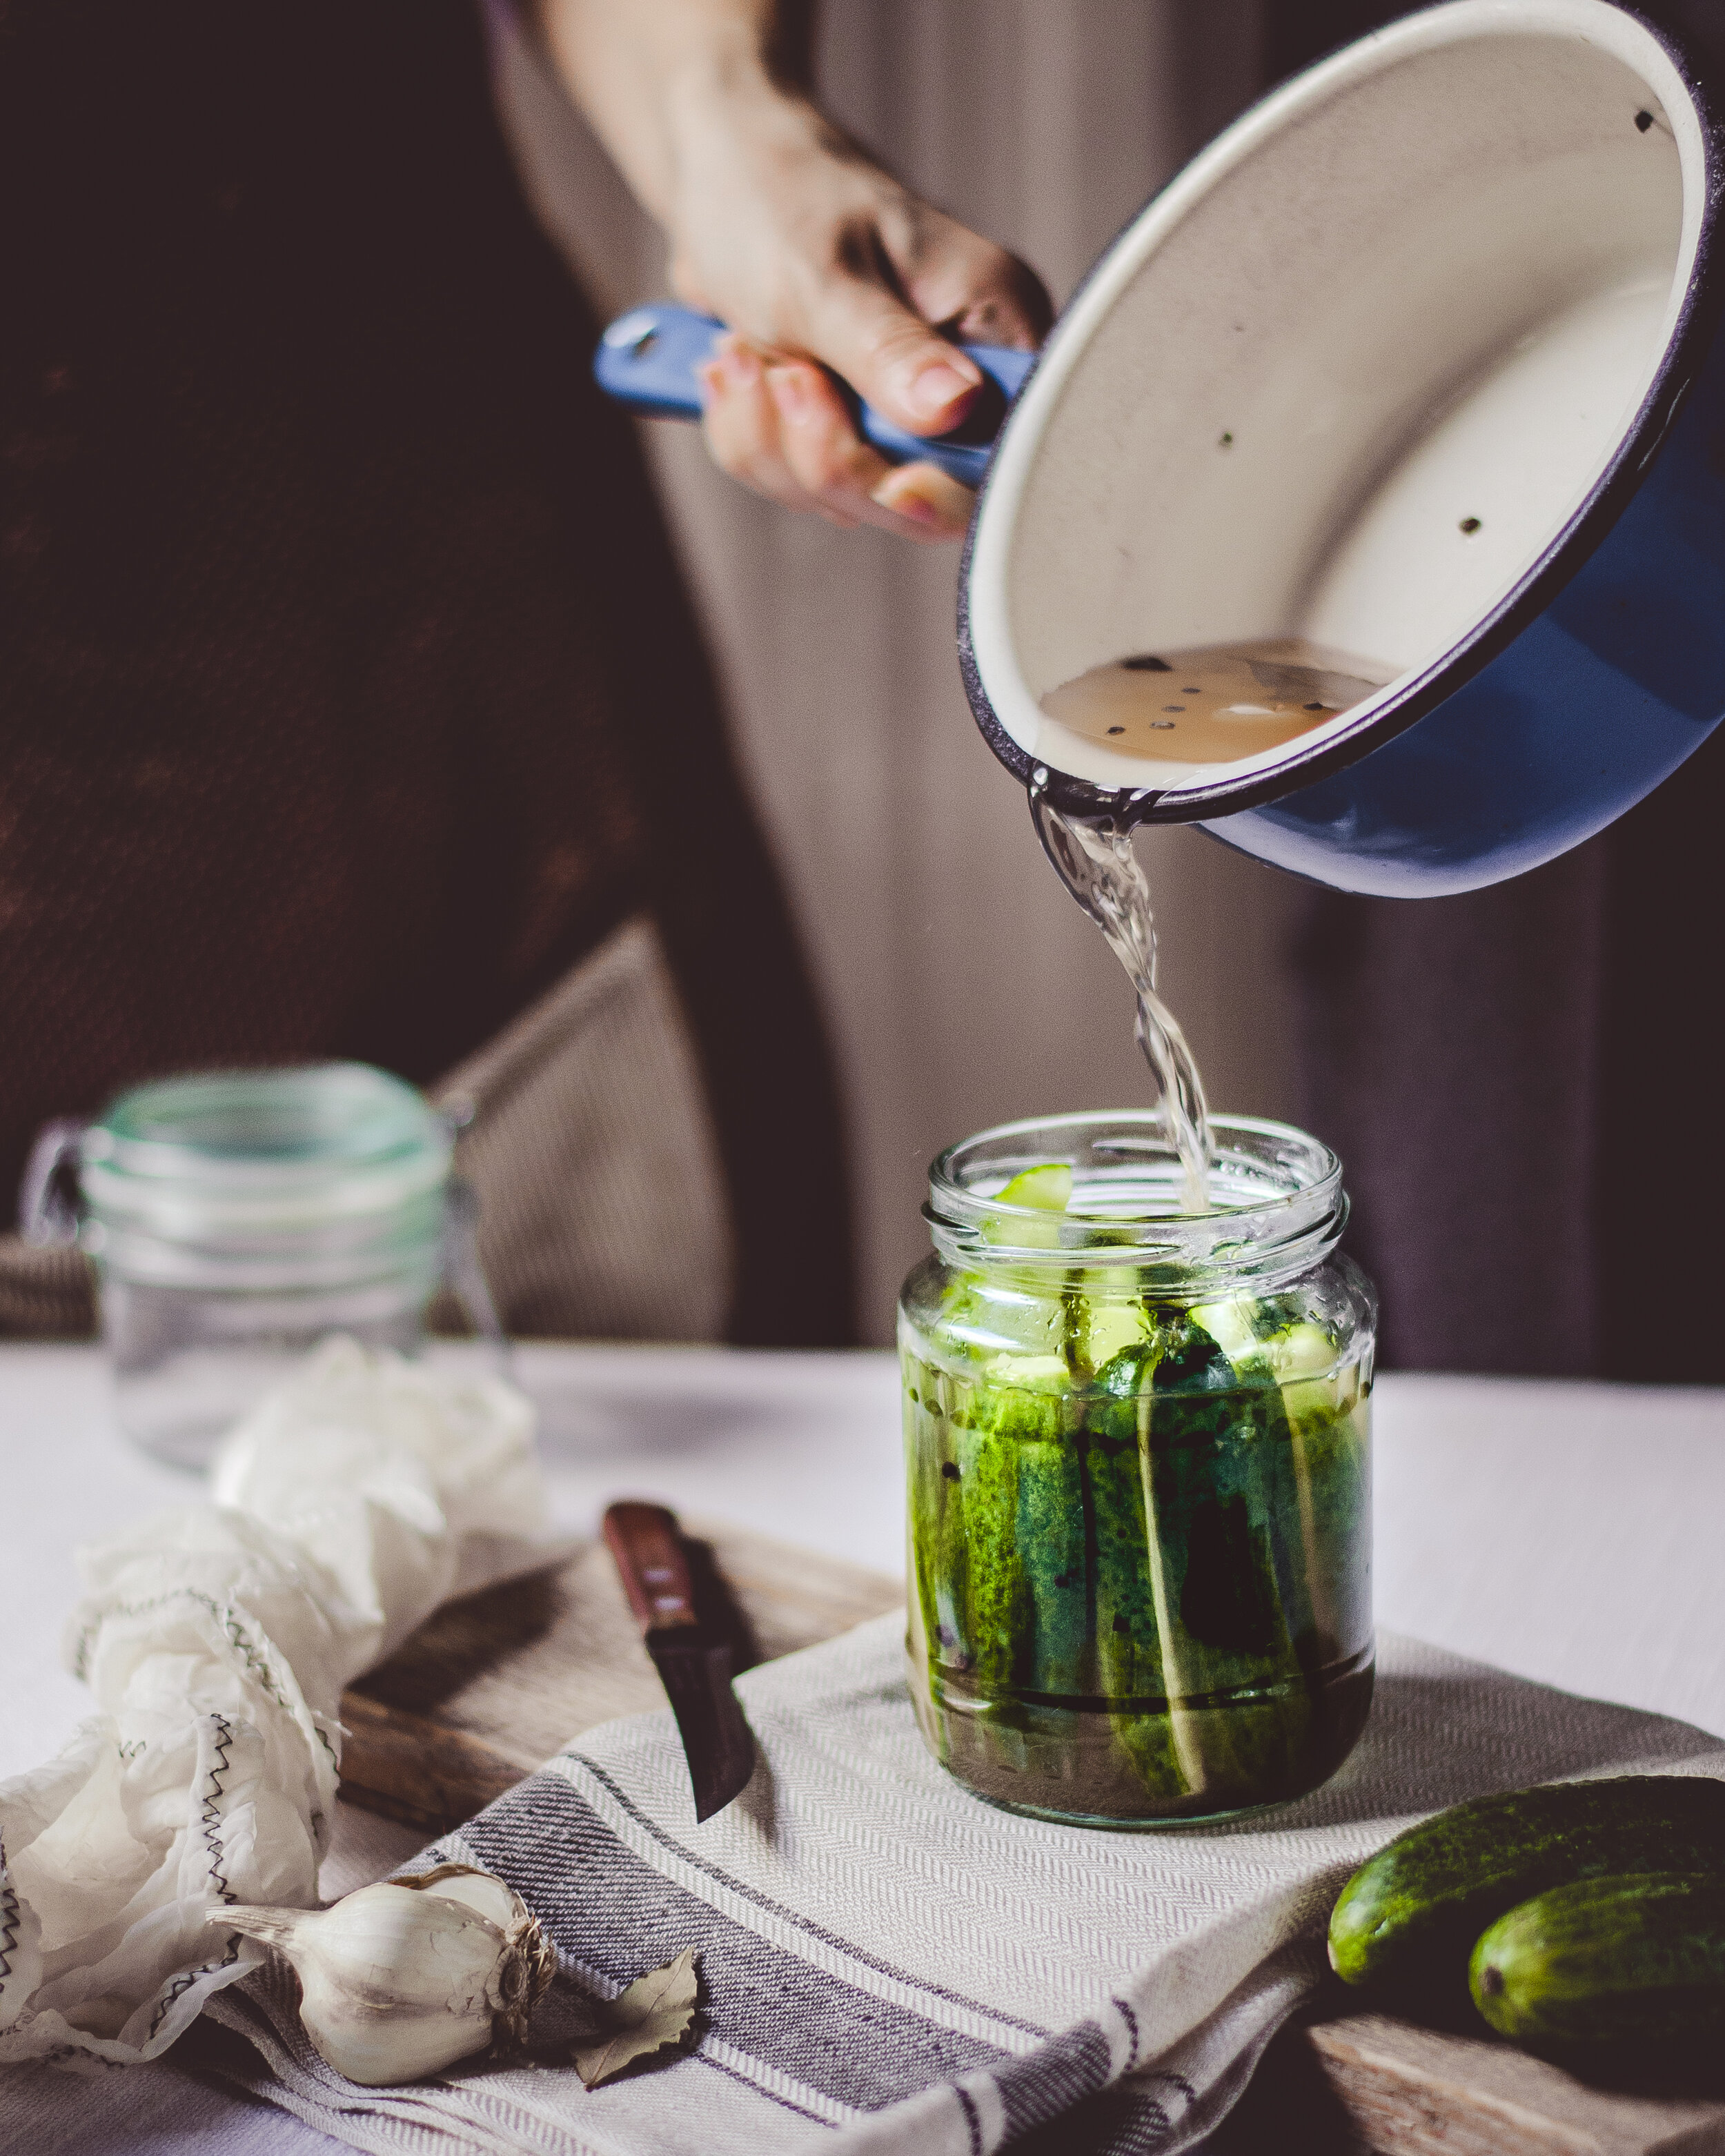
So other than making more zucchini bread or eating another salad tonight, what can you do to preserve your bounty? Start picking of course! Pickling is a preservation method that helps to lengthen the shelf life of your fruits and vegetables by creating an acidic and/or anaerobic environment to inhibit bacterial growth. Vegetables and fruits can be either immersed in vinegar or a salt solution to extend the shelf life, encourage fermentation, and create an entirely new flavor and texture profile. Did you plant a few too many cucumber plants? Make dill pickles! That one jalapeno pepper plant just exploded with peppers? Pickle ‘em! Once you get the hang of the general process you can use what you have on hand to create interesting flavor profiles that will keep you eating from your garden until there’s snow on the ground.
Go “all-in” and boil your jars after canning to make them shelf-stable or simply follow the videos and recipes below and just store the jars in the fridge until you’re ready to enjoy them.
Excited to get pickling? Check out the how-to videos below to get started!
Pickled Zucchini
3- 4 medium zucchini
6 sprigs fresh dill
FOR EACH JAR
2 halves garlic
½ tsp black peppercorn
½ tsp mustard seed
½ tsp dill seed
FOR THE BRINE
2 ½ cups water
1 cup vinegar
2 tbsp granulated sugar
2 tbsp kosher salt or coarse sea salt
METHOD
1. Wash and trim the zucchini. Discard the ends.
2. Slice into chips or spears. Set aside.
3. Divide the seasonings between 3 clean pint-sized mason jars. Arrange the zucchini chips or spears and dill in the jar.
4. Combine all the brine ingredients in a medium saucepan and place over medium high heat.
5. Bring to a boil and then remove the pan from the heat.
6. Carefully pour the hot brine over the zucchini and fresh dill. Tightly secure the lids and shake the jars.
7. Allow to cool slightly on the kitchen counter for 30 minutes before placing in the refrigerator,
8. Refrigerate for 24 hours or more before eating.
Roasted Pickled Beets with Ginger
FOR THE ROASTED BEETS
6 medium beets, cleaned, 1-inch stem remaining
2 shallots peeled
2 sprigs rosemary
2 tsp olive oil
METHOD
1. Preheat the oven to 400 degrees F.
2. Toss the ingredients together.
3. Place in a foil pouch and roast in the oven for 40 minutes.
FOR THE PICKLE
1 large red onion sliced
I 2-inch piece of ginger peeled and sliced thinly
1 cup tarragon vinegar
1 ½ tsp kosher salt
½ cup sugar
1 cup water
METHOD
1. Remove the skin from the beets and slice thinly.
2. Arrange the sliced beets in 1-quart jars alternating with layers of onion and ginger.
3. In a small pot, bring the rest of the ingredients to a boil.
4. Pour over the beets. Tightly close the jars and gently turn them upside down. Allow to cool for 30 minutes.
5. Place the jars in the refrigerator for 3 to 7 days before serving.
Pickled Jalapenos with Chive Flowers
7-8 jalapenos thinly sliced
3 chive flowers per jar
FOR THE BRINE
1 cup white vinegar
1 cup water
2 cloves water smashed
1 tbsp sugar
1 tbsp salt
OPTIONAL
Coriander seed
Mustard seed
Celery seed
1 tsp each
METHOD
1. Combine vinegar, water, sugar, and salt,
2. Bring to a boil.
3. Add the jalapeno slices, stir, and remove from the heat.
4. Let sit for about 8 minutes.
5. Place the chive flowers in the corners in the jar,
6. Use the tongs to remove the jalapenos from the pot and place in the jar.
7. Cover with the brining liquid to fill the jar.
8. Allow to cool.
9. Store in the fridge for up to 2 months.
Use on pizza, sandwiches and in cooking.
Spicy Cucumber Pickles
1 lb cocktail cucumbers (washed, patted dry with paper towels)
2 bulbs garlic peeled
FOR THE BRINE
1 cup white vinegar
½ tsp dill weed
1 ½ tsp kosher salt
3 tbsp sugar
1 tbsp red chili flakes
METHOD
1. Combine the vinegar, dill seed, red pepper flakes, salt, and sugar in a small saucepan over medium heat.
2. Bring to a boil stirring to dissolve the sugar and salt. Turn off the stove. Allow to cool completely.
3. Cut off ¼ inch of both ends of each cucumber. Place the cucumbers and garlic in sterilized jars.
4. Pour the cooled pickling liquid into the jars,
5. Cover and place in the refrigerator for 2 to 3 days.